Hello All,
Greetings. Welcome to the PowerShell hub.
Today, I’m sharing a PowerShell script that demonstrates how to upload the document to document library.
Background
In our project, the News editor team publishes a number of news templates. They would like these templates to be available across all of SharePoint sites.
To achieve this, we can use PowerShell script that iterates through all SharePoint sites and upload the templates to the template folder within SitePages library of each site.
In this article, we will walk through a script that uploads a single file to a document library.
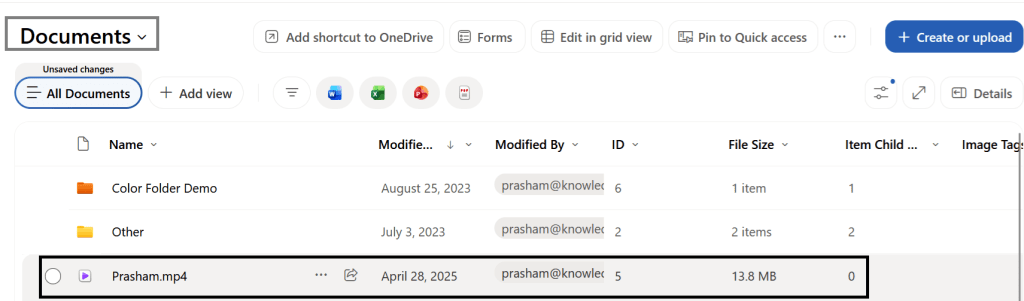
Documents in the document library of the site before uploading the file
Steps to Upload the Document to a Document Library
- Here, we will use PnP PowerShell cmdlets
- Connect to the SharePoint site
- We will connect to the tenant using PnP PowerShell CMDLET – Connect-PnPOnline
- To connect to the tenant using Connect-PnPOnline we will require following values
- SharePoint site URL – site where we need to hide the OOB search box
- Application ID / Client ID – The Client ID of the Entra ID Application
- Certificate Path – Path to the certificate containing the private key (*.pfx)
- Certificate Password – Password for certificate
- Tenant ID
- Initialize the required variables
$SharePointSiteUrl = "https://knowledgejunction1.sharepoint.com/sites/TestNavBar"$ClientId = "<client id>>"$CertificatePath = "C:\Prasham\m365KJ.pfx"$CertificatePassword = "<certificate password>>"$CertificatePassword = (ConvertTo-SecureString -AsPlainText $CertificatePassword -Force)
- Using above variables, connect to the tenant. We will connect to the tenant using PnP PowerShell CMDLET – Connect-PnPOnline
Connect-PnPOnline -Url $SharePointSiteUrl -ClientId $ClientId -CertificatePath $CertificatePath -CertificatePassword $CertificatePassword -Tenant 'knowledgejunction1.onmicrosoft.com' -WarningAction Ignore
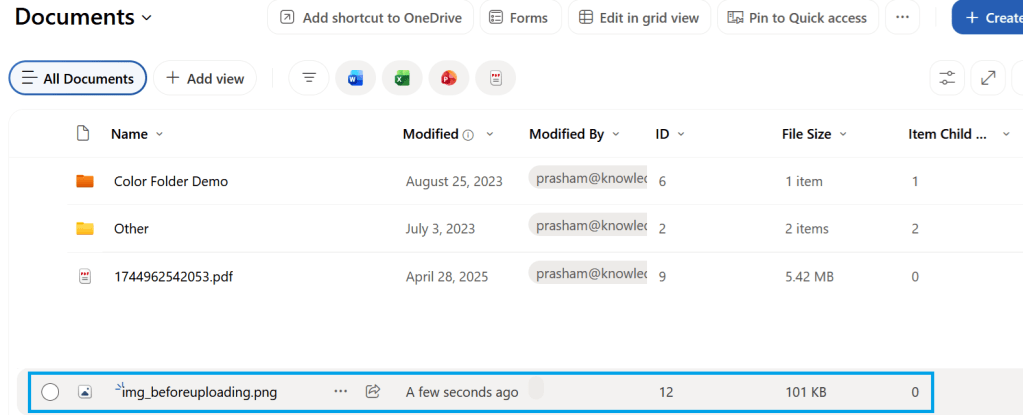
- Once we are connected successfully, we are ready to upload the file using PnP PowerShell CMDLET – Add-PnPFile
- We will need following values –
- path of the file which we need to upload
- Library name where we need to upload the respective file
$LocalFilePath = "C:\Prasham\Articles\PowerShell\SPO\uploading file to library\img_beforeuploading.png"$TargetLibrary = "Shared Documents" # Relative URL or Name of the LibraryWrite-Host "Uploading file..."Add-PnPFile -Path $LocalFilePath -Folder $TargetLibrary
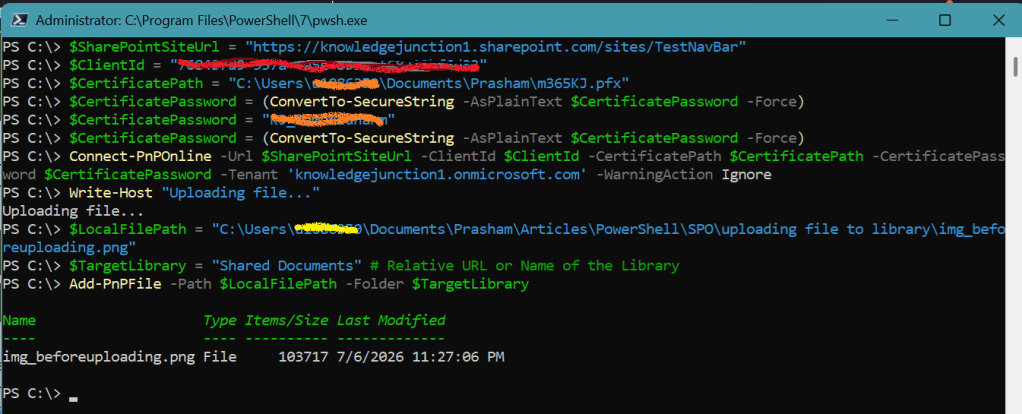
Complete Script
$SharePointSiteUrl = "https://knowledgejunction1.sharepoint.com/sites/TestNavBar"$ClientId = "<client id>>"$CertificatePath = "C:\Prasham\m365KJ.pfx"$CertificatePassword = "<certificate password>>"$LocalFilePath = "C:\Prasham\Articles\PowerShell\SPO\uploading file to library\img_beforeuploading.png"$TargetLibrary = "Shared Documents" # Relative URL or Name of the LibraryConnect-PnPOnline -Url $SharePointSiteUrl -ClientId $ClientId -CertificatePath $CertificatePath -CertificatePassword $CertificatePassword -Tenant 'knowledgejunction1.onmicrosoft.com' -WarningAction IgnoreAdd-PnPFile -Path $LocalFilePath -Folder $TargetLibrary
References
Thank you for reading ! Have a great time ahead :)
Feel free to discuss about PowerShell scripts. HAPPY to HELP!

